


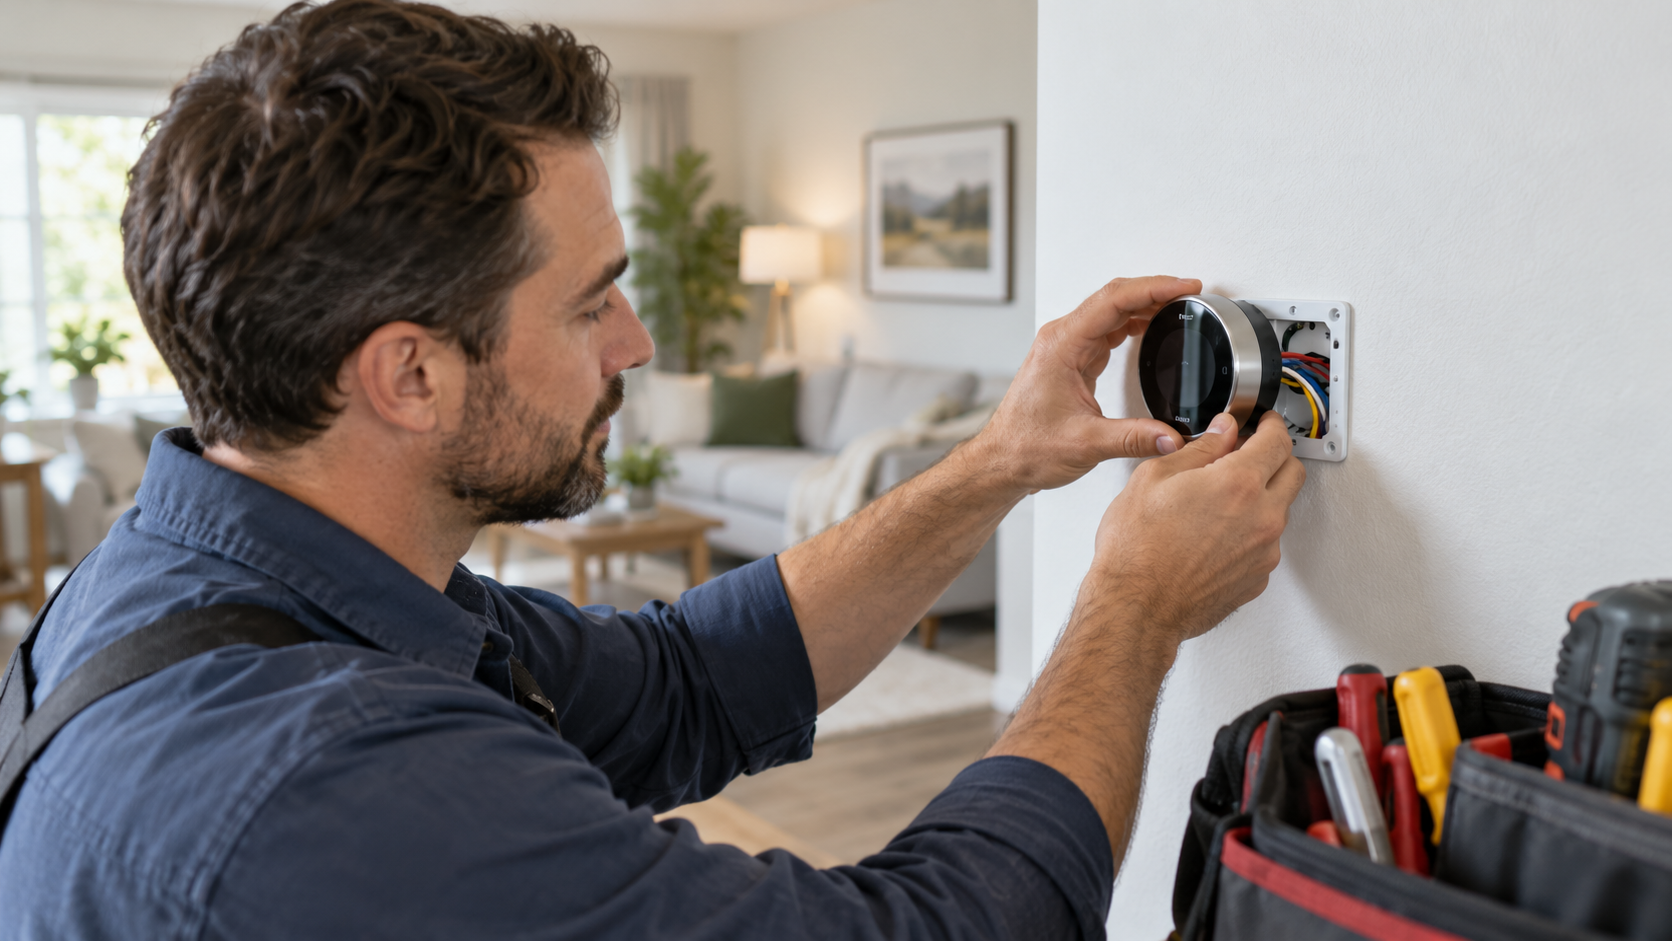
Replacing a thermostat looks like one of those home projects that should take 15 minutes.
Take the old one off the wall. Put the new one on. Connect a few tiny wires. Done, right?
Sometimes, yes.
If you have a conventional 24-volt HVAC system and you are replacing a basic thermostat with a compatible model, the job can be surprisingly straightforward. A careful homeowner can often finish it in under an hour.
But thermostats are also where simple DIY projects occasionally take a sharp turn. Heat pumps, dual-fuel systems, zoning panels, proprietary communicating controls, missing C-wires, and line-voltage baseboard heaters can make the wiring much less obvious.
That is why learning how to install a thermostat starts before you remove a single screw.
The most important rule is simple: identify the system first, photograph the old wiring, turn off HVAC power, and connect wires according to terminal labels rather than wire colors.
Do that, and the job is often manageable. Guess, and you can turn a $150 thermostat upgrade into an HVAC service call.
First, Make Sure the New Thermostat Is Compatible
Do not assume every thermostat works with every heating and cooling system.
Most central residential furnaces, air conditioners, and heat pumps in the United States use low-voltage thermostat controls, commonly around 24 volts. Many programmable and smart thermostats are designed for these systems.
But there are important exceptions.
Electric baseboard heaters and some wall heaters often use line-voltage thermostats operating at 120 or 240 volts. ENERGY STAR also notes that many mainstream smart thermostats are not designed for typical line-voltage baseboard systems.
If the old thermostat is marked 120V or 240V, or you remove the cover and find thick electrical wires joined with wire nuts, stop. The low-voltage installation instructions in this guide are not for that system.
A line-voltage thermostat needs a compatible control and involves household electrical voltage. That is a good job for a qualified electrician unless you already have the required electrical skills.
There is another category to watch for: proprietary communicating HVAC systems. Some premium furnaces and heat pumps use manufacturer-specific thermostats that exchange digital information with the equipment. Replacing one with a generic smart thermostat can remove functions or prevent the system from operating correctly.
Before buying anything, run your existing terminal configuration through the new thermostat manufacturer’s compatibility checker.
What You Need Before You Begin
You do not need an HVAC truck full of equipment for a normal low-voltage replacement.
- New thermostat that is confirmed compatible with your HVAC system
- Small Phillips and flat-head screwdrivers
- Phone or camera for photographing the old wiring
- Wire labels or small pieces of masking tape
- Pencil
- Small level if the thermostat base does not include one
- Drill and wall anchors if the new mounting holes do not match
- Flashlight
- Your new thermostat’s installation guide or setup app
Keep the old thermostat nearby until the new system is completely tested.
That old piece of plastic may suddenly become a very useful wiring reference.
Understand the Thermostat Wire Labels
Here is where people often make their first mistake.
Do not identify thermostat wires by color alone.
A red wire is commonly connected to R. A yellow wire is commonly Y. A green wire often controls G.
But “commonly” is not the same thing as “always.”
The installer who wired your house 20 years ago may have used whatever conductor was available. A blue wire could be C in one home and something completely different in another.
What matters is the letter printed beside the terminal on the old thermostat.
| Terminal | Common Function | What to Know |
|---|---|---|
| R / Rh / Rc | 24V power | R may serve the whole system; Rh and Rc can separate heating and cooling power |
| C | Common wire | Provides continuous power used by many smart thermostats |
| W / W1 | Heating | Calls for first-stage conventional heat |
| W2 / AUX | Second-stage or auxiliary heat | Often seen with multi-stage furnaces or heat pumps |
| Y / Y1 | Cooling / compressor | Calls for first-stage cooling or heat-pump compressor operation |
| Y2 | Second-stage cooling | Used with some two-stage systems |
| G | Indoor fan | Controls the blower fan on many conventional systems |
| O/B | Heat-pump reversing valve | Changes the heat pump between heating and cooling modes |
This table is a general reference, not a substitute for the wiring diagram supplied with your thermostat.
The same terminal can be handled differently by different control systems. Heat pumps are particularly important here because an O/B connection must also be configured correctly during setup.
Turn Off the HVAC Power
Do not rely on setting the thermostat to “Off.”
That turns off the heating or cooling call. It does not necessarily remove electrical power from the control circuit.
Turn off power to the heating and cooling equipment at the appropriate breaker. Many furnaces and air handlers also have a nearby service switch that looks a lot like a normal light switch. Turn that off as well.
Why bother if thermostat wires are normally low voltage?
Because accidentally touching the R power wire to the wrong terminal can short the control circuit and blow a small fuse on the furnace control board. Then your brand-new thermostat appears completely dead and your Saturday project suddenly becomes detective work.
After turning power off, try changing the old thermostat’s setting. The furnace, fan, or AC should not start.
Remove Only the Thermostat Face First
Do not immediately unscrew the whole thermostat from the wall.
First remove the display or front cover so you can see the wiring terminals while everything is still attached.
Now stop and take a clear photograph.
Actually, take two.
Make sure every wire and terminal letter is visible. If the thermostat has a short jumper wire between two terminals, capture that too.
This photo is your insurance policy.
If setup becomes confusing later, you can go back and see exactly how the previous control was connected.
Label Every Wire by Its Terminal
Before disconnecting anything, label each conductor according to the terminal it is connected to.
If the white wire is connected to W, label it W.
If the blue wire is connected to Y, label it Y, even if every diagram you found online insists cooling wires are supposed to be yellow.
Your house wins the argument.
Some new thermostats include wire-label stickers in the box. Masking tape and a pen work just as well.
Be especially careful with R, Rh, Rc, AUX, E, and O/B terminals. These can vary between systems and thermostat designs.
Watch for Jumper Wires
Older thermostats sometimes have a small jumper connecting Rh and Rc.
Do not automatically reproduce that jumper on the new thermostat.
Many modern smart thermostats handle this connection internally and specifically instruct owners not to install the old jumper.
Save it with the old thermostat and follow the new model’s wiring diagram.
This is another reason blindly moving every piece of metal from the old base to the new one is not a great plan.
Disconnect the Old Thermostat Wires
Once every conductor is labeled and photographed, release the wires from their terminals.
Some thermostats use screws. Others use spring clips or small push tabs.
As the wires come free, prevent them from disappearing into the wall.
Thermostat cable has a remarkable talent for sliding backward into a hole exactly when you need it.
Wrap the bundle around a pencil or lightly tape it to the wall until the new base is ready.
Check an Old Thermostat for Mercury
If you are replacing an old mechanical thermostat, handle it carefully.
Some older models contain mercury switches in small sealed glass bulbs.
EPA guidance says mercury-containing thermostats should be properly recycled rather than placed in ordinary household trash. Local household hazardous-waste programs commonly accept them.
Do not break open the thermostat or remove the mercury ampule yourself.
If you see a small glass bulb containing a shiny silver liquid, keep the unit intact and check your local disposal requirements.
Remove the Old Wall Plate
With the wires safely held outside the wall, unscrew the old thermostat base.
You may discover an outline from old paint, oversized screw holes, or a surprisingly large opening behind the thermostat.
Small cosmetic differences are normal.
Many smart thermostat manufacturers sell trim plates that cover old paint marks and screw holes. You can also patch and paint before mounting the new thermostat if you want a cleaner finish.
Try not to leave a large open gap behind the new thermostat. Air leaking from inside a wall cavity can affect temperature readings in some installations.
Mount the New Thermostat Base
Feed the labeled thermostat wires through the center opening of the new base.
Position the base so the thermostat will sit straight and cover the old opening.
Some mounting plates include a small built-in level. If yours does not, use a separate level before marking holes.
Install anchors if required by the wall material and the manufacturer’s instructions, then secure the base.
Tighten the screws enough to hold it firmly, but do not distort a thin plastic mounting plate by overtightening.
Connect the Wires to the New Thermostat
Now match each labeled wire to the terminal specified by the new thermostat’s custom wiring diagram.
Push each conductor fully into its terminal. Give it a gentle tug afterward to confirm it is locked in place.
A loose thermostat wire can create maddening intermittent problems. The heat works one day, stops the next, then mysteriously works again after someone touches the thermostat.
Also make sure excess bare copper is not exposed outside the connector where it could touch another terminal.
Do not connect a wire simply because its insulation color “looks right.”
Use your labels, old wiring photograph, HVAC equipment information, and new thermostat instructions.
What Is a C-Wire and Do You Need One?
The C-wire is probably responsible for more smart-thermostat confusion than every other thermostat wire combined.
C stands for common.
Unlike Y or W, it does not tell the furnace to heat or the air conditioner to cool. It provides a return path that allows the thermostat to receive continuous low-voltage power.
That steady power is useful because a smart thermostat may need to run Wi-Fi, a display, sensors, processors, and remote-control features around the clock.
Many smart thermostats prefer or require a C-wire. Some models can work without one on certain HVAC systems, while others need a manufacturer-approved power accessory.
Google, for example, states that some Nest installations operate without a C-wire, while certain heating-only, cooling-only, zoned, and heat-pump systems may require either C or a compatible power connector.
So “my old thermostat didn’t use a C-wire” does not automatically mean the new thermostat cannot work.
What If There Is No C-Wire Connected?
Remove the old thermostat carefully and look at the cable bundle.
Sometimes an unused conductor has been tucked behind the wall because the previous thermostat did not need it.
But finding a spare wire at the thermostat does not necessarily mean it is already connected at the other end. It needs the correct connection at the HVAC equipment too.
Do not start randomly moving wires around inside the furnace cabinet unless the thermostat and HVAC instructions clearly cover the procedure and you are comfortable working around HVAC electrical components.
Depending on the system, the practical solutions may include a compatible manufacturer power accessory, having an HVAC technician connect an unused conductor, or running new thermostat cable.
Heat Pump Thermostats Need Extra Attention
Heat pumps use thermostat wiring a little differently from conventional furnace-and-AC combinations.
The most noticeable difference is the O/B reversing-valve wire.
A heat pump moves refrigerant in opposite directions depending on whether the house needs heating or cooling. The reversing valve controls that change.
During thermostat setup, you may be asked whether the valve is energized in cooling or heating.
Do not guess.
The correct setting depends on the equipment. Your old thermostat configuration, HVAC documentation, or manufacturer setup instructions should provide the answer.
A wrong O/B setting can create a memorable result: selecting cooling and receiving heat.
Heat pumps may also include AUX or E wiring for auxiliary or emergency heat. If your wiring does not match the thermostat’s supported heat-pump diagram, professional installation is the safer route.
When DIY Thermostat Installation Should Stop
A normal one-stage furnace and AC swap is one thing. Some systems deserve more caution.
- The old thermostat or wiring is marked 120V or 240V
- You see thick line-voltage wires or wire nuts rather than small thermostat conductors
- The HVAC system uses proprietary communicating controls
- You have a dual-fuel heat pump and furnace and cannot confirm the control configuration
- The system has multiple zones and a separate zone-control panel
- You have several heating or cooling stages and cannot match the terminals confidently
- The thermostat controls a whole-home humidifier, dehumidifier, or ventilation equipment
- Wire labels on the old thermostat do not match any supported diagram for the new model
- You find burned wiring, corrosion, melted insulation, or signs of water damage
- You restore power and a breaker or HVAC control fuse trips again
ENERGY STAR specifically notes that variable-speed, multi-stage, and zoned HVAC systems may benefit from professional thermostat installation because proper compatibility becomes more important.
There is no prize for finishing a wiring job you are no longer confident about.
Attach the Thermostat Display
Once the wires are connected and tucked neatly behind the mounting plate, attach the thermostat body or display.
Most modern units snap onto the base.
Do not force it.
If the display will not sit flush, a wire may be sticking out behind it. Remove the face and rearrange the conductors rather than pressing harder.
Restore HVAC Power
Turn the HVAC breaker back on and restore the furnace or air-handler service switch.
A smart thermostat may take a few moments to boot.
If the screen stays completely blank, turn the power back off before checking connections.
Do not repeatedly remove and reinsert live thermostat wires while experimenting. Troubleshooting is much safer with control power off.
Complete the Thermostat Setup
A conventional digital thermostat may ask for basic information such as heating type, cooling type, temperature scale, and schedule.
Smart thermostats usually ask more.
You may need to identify whether the system is a furnace or heat pump, specify fuel type, select heating and cooling stages, connect Wi-Fi, create a schedule, and pair remote sensors.
Do not rush through the equipment questions.
A thermostat needs to know what it is controlling. Incorrectly identifying a heat pump as a conventional furnace system, for example, can cause improper operation.
When possible, let the thermostat’s setup app generate a configuration from the wires it detects rather than manually inventing one.
Test Heating, Cooling, and Fan Operation
Installation is not finished just because the screen lights up.
You need to make sure the equipment responds correctly.
Test heating first or cooling first depending on outdoor conditions and the manufacturer’s guidance. Give the system time to respond. Air conditioners and heat pumps commonly have built-in compressor protection delays, so cooling may not start the instant you tap the screen.
Listen for the indoor fan and outdoor equipment where appropriate.
Confirm that the air at the supply registers changes in the expected direction.
Then test the other mode when conditions allow.
Avoid rapidly switching a compressor between heating and cooling several times just to prove the thermostat works.
Run a Final Check Before Putting the Tools Away
- Thermostat is firmly mounted and level
- No error or wiring warning appears on the display
- Heating responds when commanded
- Cooling responds when commanded
- Fan operation works as expected
- Heat-pump heating and cooling are not reversed
- Auxiliary heat is configured correctly if the system has it
- Wi-Fi and app control work on a smart thermostat
- The schedule and temperature settings are correct
- The old wiring photo has been saved in case future service is needed
Keep the photo. Seriously.
Three years from now, an HVAC technician may appreciate having it.
Why the New Thermostat May Not Turn On
If the screen is blank after power is restored, resist the urge to assume the thermostat is defective.
Check that the HVAC breaker and equipment service switch are both on.
Then shut power off again and check whether the R and C wires, if required, are fully inserted.
A low-voltage fuse on the HVAC control board may also have opened if wires touched while power was on. Diagnosing and replacing that fuse is straightforward for an HVAC professional, but repeatedly replacing fuses without determining why they fail is not a solution.
Smart thermostats may also report insufficient power when a C-wire or approved power accessory is needed.
What If the AC Runs When You Select Heat?
If you have a heat pump, the first suspect is often the reversing-valve configuration.
Thermostat setup may offer an O or B setting depending on whether the valve is energized in cooling or heating.
Check the old thermostat settings, equipment documentation, or model-specific installation instructions rather than simply flipping the option and hoping.
If you have a conventional furnace rather than a heat pump, heating and cooling behaving backward suggests a configuration or wiring error that deserves a careful recheck.
What If the Fan Never Stops?
Start with the obvious: make sure the thermostat fan setting says Auto rather than On.
If it is already in Auto, shut down the HVAC power and recheck the G terminal and setup configuration.
Some advanced HVAC equipment manages fan operation internally, so generic troubleshooting does not fit every system.
If the blower continues running despite correct thermostat settings, an HVAC technician can determine whether the problem is the thermostat, wiring, relay, control board, or equipment configuration.
Where Should a Thermostat Be Located?
If you are simply replacing an existing thermostat, keeping it in the same location is normally easiest.
Relocating one requires new wiring and introduces another question: where will the thermostat get the most representative temperature reading?
A good thermostat location is generally on an interior wall in an occupied area with normal air circulation.
Avoid locations directly beside exterior doors, sunny windows, supply registers, fireplaces, kitchens, or other heat sources.
A thermostat that sits in direct afternoon sun may think the entire house is hotter than it really is. One beside a supply register can shut the system down before distant rooms become comfortable.
If the existing location has always produced large comfort problems, moving the thermostat or adding compatible room sensors may make more sense than installing the new device in exactly the same bad spot.
Smart Thermostat or Basic Programmable Thermostat?
You do not need Wi-Fi to control a furnace successfully.
A basic programmable thermostat remains a perfectly reasonable choice for someone who wants predictable schedules and simple controls.
A smart thermostat adds remote access, automatic scheduling, occupancy features, energy reports, sensor support, and other conveniences depending on the model.
ENERGY STAR estimates that certified smart thermostats save the average household about 8% on heating and cooling costs, roughly $50 per year on average. Actual savings depend on climate, existing thermostat habits, household schedule, and HVAC equipment.
If you already adjust temperatures carefully every day, your savings may be smaller.
If your old thermostat holds the same temperature 24 hours a day while the house sits empty for eight hours, there may be more room to save.
How Much Does Professional Thermostat Installation Cost?
If the wiring looks questionable, professional help is not an enormous project in most homes.
Current 2026 U.S. cost data puts many professional thermostat installations around $114 to $265, depending on thermostat type and HVAC compatibility. National averages are close to $180.
A basic replacement with existing wiring usually sits toward the lower end.
Smart thermostats, new thermostat cable, a missing C-wire, multiple zones, wall repair, advanced heat-pump controls, or proprietary HVAC equipment can push the bill higher.
| Installation Situation | Typical Approach | What to Expect |
|---|---|---|
| Simple 24V thermostat replacement | DIY or professional | Usually straightforward when terminal labels match |
| Smart thermostat with existing C-wire | DIY-friendly for many homeowners | Extra setup for Wi-Fi and HVAC configuration |
| Missing required C-wire | Adapter, new wire, or professional installation | Additional equipment or wiring may be needed |
| Heat pump with AUX / emergency heat | DIY only with confirmed compatibility | O/B and auxiliary heat must be configured correctly |
| Zoned or communicating HVAC | Professional recommended | Control system may use specialized wiring or programming |
| 120V or 240V line-voltage thermostat | Qualified electrician recommended | Household voltage is present at the thermostat |
How Long Does Thermostat Installation Take?
A simple low-voltage replacement can take roughly 30 to 60 minutes.
If the new base does not match the wall, setup is complicated, a C-wire issue appears, or Wi-Fi refuses to cooperate, plan on longer.
Professional installations can also take additional time when wiring must be repaired or the technician needs to inspect the HVAC control system.
Do not judge success by speed.
Taking five extra minutes to label the wires is considerably faster than spending two hours trying to remember where the blue one used to be.
Can Installing a Thermostat Damage the HVAC System?
It is possible, although a normal low-voltage replacement done with the power off is generally a manageable project.
The most common DIY trouble comes from incorrect wiring, shorting low-voltage conductors, installing an incompatible thermostat, or configuring the thermostat for the wrong HVAC equipment.
That is why turning off power and preserving the old wiring information matter so much.
A thermostat is small, but it is the control center telling expensive equipment what to do.
FAQ
Can I install a thermostat myself?
Many homeowners can replace a standard low-voltage thermostat when the new model is compatible and the existing wires are clearly labeled. Line-voltage, communicating, zoned, dual-fuel, and unusually complex systems are better handled by a qualified professional.
Do I need to turn off electricity before changing a thermostat?
Yes. Turn off power to the HVAC equipment at the appropriate breaker and service switch before disconnecting thermostat wiring. Even low-voltage wiring can short and damage a control fuse if connections are moved while energized.
Does wire color matter when installing a thermostat?
Do not rely on color. Label wires according to the terminal letters on the old thermostat before removing them. Installation practices vary, so the actual terminal connection is more reliable than insulation color.
Do all smart thermostats need a C-wire?
No. Some smart thermostats can operate without a C-wire on certain HVAC systems, while others require one or need a compatible power accessory. Check the exact thermostat and HVAC configuration before buying.
What happens if I connect thermostat wires incorrectly?
The HVAC system may not operate, may run the wrong mode, or may blow a low-voltage control fuse. Turn power off before correcting wiring and compare the installation with your original wiring photo and the manufacturer’s diagram.
Can I replace a 120V or 240V thermostat with a smart thermostat?
Only with a thermostat specifically designed for that voltage and heating system. Most common smart thermostats are made for low-voltage HVAC equipment and must not be connected directly to 120V or 240V wiring.
How much does it cost to have a thermostat professionally installed?
In 2026, professional thermostat installation commonly costs around $114 to $265 for many U.S. projects, with an average close to $180. New wiring, smart controls, zoning, advanced HVAC equipment, or C-wire work can increase the price.
Conclusion
Learning how to install a thermostat is mostly about resisting the urge to move too fast.
The physical job is small. A thermostat weighs almost nothing, the wires are tiny, and most wall plates are held on by a couple of screws.
The important work is identification.
Confirm that the new thermostat is compatible with the HVAC system. Turn off power. Photograph the existing wiring before touching it. Label each wire by its terminal, not by color. Save the old thermostat until the new one has been tested.
Then follow the wiring diagram for the exact model you purchased.
If you have a straightforward 24-volt furnace and central AC system, that may be all there is to it. Connect R, W, Y, G, and C where required, mount the display, restore power, complete setup, and test heating and cooling.
Heat pumps deserve a little more patience because of O/B and auxiliary heat settings. Smart thermostats may add a C-wire question. Zoned, variable-speed, dual-fuel, and proprietary communicating systems can move the job firmly into professional territory.
And line-voltage thermostats are a separate category entirely.
If you see 120V, 240V, thick electrical conductors, or wire nuts, do not connect a standard low-voltage smart thermostat.
Once everything is installed, test the system rather than simply admiring the new screen.
Heat should heat. Cooling should cool. The fan should behave normally. A heat pump should not blow warm air when you ask for AC. Smart controls should stay powered and connected.
If those basics work, the project is finished.
And after all that labeling, photographing, checking, and setup, the new thermostat should become one of the least interesting things in your house.
It quietly maintains the temperature, changes the schedule when needed, and lets the HVAC equipment get on with its job.
That is exactly how a thermostat should behave.
Leave a Reply