
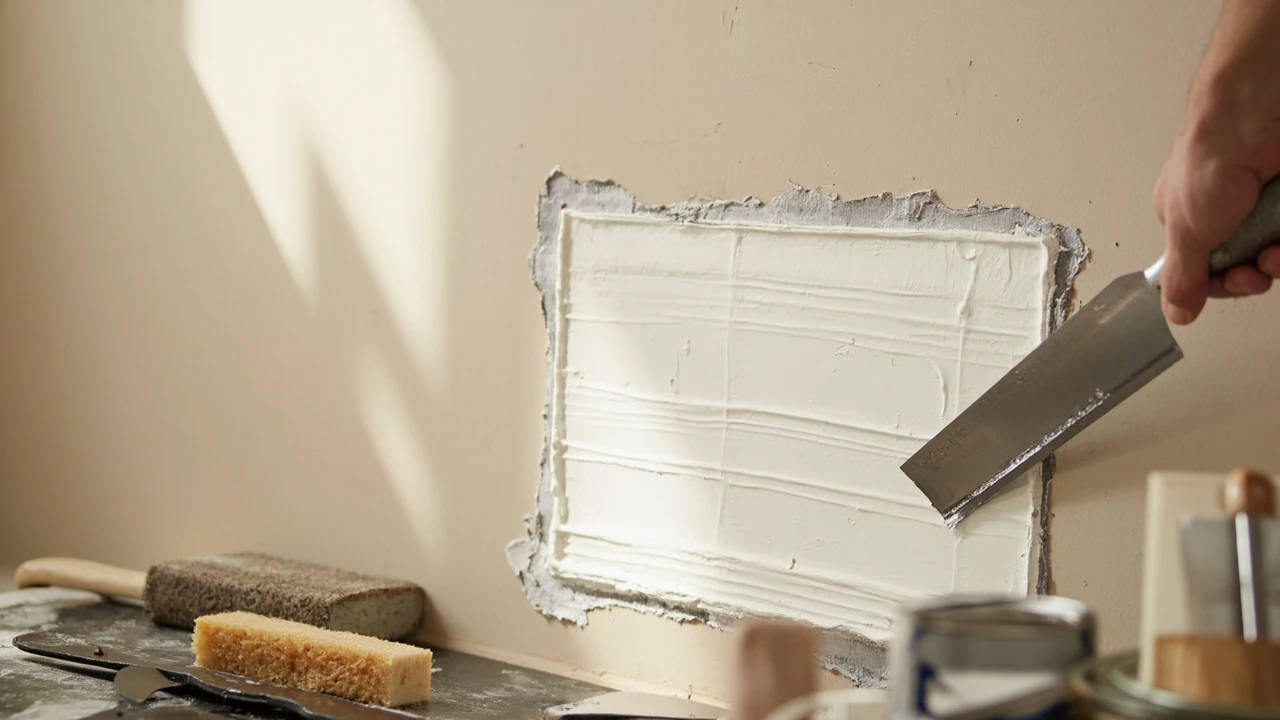
How to patch a hole in drywall
A doorknob swings open a little too hard, a chair gets shoved back during a family argument, an overzealous game of indoor football sends an elbow through the wall. The result is the same: a ragged hole staring out from the drywall, and a homeowner wondering whether to call a contractor or just live with it. Most holes between a quarter inch and about six inches across are well within reach of a careful DIY repair, and the skill transfers directly to nail pops, anchor pulls, and accidental dings in other rooms.
Learning how to patch a hole in drywall comes down to matching the repair method to the size of the damage, using the right materials, and taking the time to blend the patch into the surrounding surface. The job is more about patience than talent, and the same basic sequence works in hallways, bedrooms, and around electrical boxes. Done well, a patched area is invisible under flat or eggshell paint; done poorly, it telegraphs as a smooth rectangle against a textured wall or as a faint outline under raking light.
This guide walks through the tools, the decision points, and the actual sequence for a clean repair, with notes on what tends to go wrong and how to avoid it. The focus is on practical, real-world results rather than finishing-shop perfection.
Match the repair method to the size of the hole
Before reaching for a patch kit, it helps to measure the damage and decide which approach fits. Drywall repair is usually split into three rough categories, and the cutoffs are based on what physically fits through the opening and what holds joint compound without sagging.
| Hole size | Common cause | Recommended method | Typical dry time |
|---|---|---|---|
| Under 1/2 inch | Nail, screw, or picture hanger | Fill directly with joint compound, no patch | 2 to 4 hours per coat |
| 1/2 inch to 2 inches | Doorknob impact, anchor pull, small fist | Self-adhesive mesh or metal patch | 2 to 4 hours per coat, plus overnight texture |
| 2 inches to 6 inches | Chair, elbow, furniture strike | Self-adhesive patch plus two to three compound coats | Full day including texture and primer |
| Larger than 6 inches | Furniture, plumbing access, remodel damage | Cut back to studs, install a new drywall piece | Two to three days including full retexture |
The self-adhesive patch method is the workhorse for most household repairs, and it is the approach the rest of this guide focuses on. If the damage is larger than six inches or if a stud has been crushed, the right move is usually to cut the damaged area back to clean drywall and install a new piece screwed into the framing. That is a more advanced job and is often faster than trying to force a small patch to cover too much area.
Tools and materials you will need
Most of the supplies for a standard patch are inexpensive and reusable across multiple repairs. A basic kit fits easily in a five-gallon bucket and will last through a dozen small jobs before the joint knife needs to be replaced.
- Self-adhesive drywall patch (mesh or aluminum) sized so it overlaps the hole by at least one inch on every side
- Utility knife with a fresh blade, plus a drywall or keyhole saw for larger openings
- Flexible joint knife, six inches wide for most work, with a ten-inch knife for wider feathering on larger patches
- All-purpose joint compound, either premixed in a tub or as a dry powder mixed in small batches
- Dry sanding sponge or fine-grit hand sander for smoothing dried compound
- Dust-free sanding pole if the area is large, plus a shop vacuum with a fine filter
- Stud finder and a pencil for marking framing and any hidden wiring
- Texture sponge, texture spray, or a small can of matching wall texture, depending on the existing finish
- Primer and matching wall paint, plus a small roller for a flat, even sheen
- Painter’s tape, drop cloth, and a damp rag for cleanup
Two small upgrades are worth it for anyone who plans to do more than one repair. A flexible joint knife flexes just enough to press compound evenly through the mesh of a patch, which makes the bond more durable. A dry sanding sponge produces much less airborne dust than traditional sandpaper wrapped around a block, and it is easier on the hands when feathering edges.
Prepare the area before you patch
Good preparation is what separates a patch that disappears from one that stays visible. Skipping the cleanup or leaving frayed paper around the opening will push back against the compound and create bubbles or weak spots that show through paint.
Start by clearing the room of furniture within a few feet of the wall, and lay a drop cloth on the floor. Dust from sanding and drips of joint compound are both easier to manage when they land on canvas or plastic rather than carpet. Remove any loose paint chips, screws, or anchors from the damaged area, and pull any protruding paper from the edges of the hole so the opening has a relatively clean perimeter.
Run a stud finder across and around the hole to mark the nearest studs on either side. The patch does not need to land on a stud, but it is important to know where the framing is so a utility saw or keyhole saw does not cut into wood or, worse, into a hidden wire. If the wall has a texture, photograph the area at an angle under bright light so the pattern is easier to match later.
Finally, wipe the wall around the hole with a slightly damp rag to remove dust. Joint compound sticks poorly to dusty surfaces, and a clean area gives the adhesive patch a stronger initial bond.
Cut a clean rectangle around the damage
For holes between roughly one inch and six inches, the standard step is to square the opening into a clean rectangle before applying the patch. A ragged hole with crushed paper and bent gypsum pushes back against joint compound and tends to crack at the edges as it dries.
Using a pencil and a small level, mark a rectangle around the damaged area that extends just past the visible damage into sound drywall. Score along the lines with a fresh utility knife, then cut through the drywall paper with a keyhole saw or a drywall saw. Pull the damaged piece free, and vacuum or brush out any loose dust and paper fragments from the opening.
The goal is not a perfect rectangle, but a flat, even surface that the patch can sit against. If the cut edges are uneven, a few light passes with the utility knife will tidy them up. Wipe the inside of the opening once more before moving on.
Set the patch
With the area clean and squared off, the patch itself goes on quickly. Peel the paper backing from a self-adhesive drywall patch and press the sticky side firmly over the hole, with at least one inch of overlap on every side. Run a hand over the entire patch, working from the center out, to push out any air pockets and to make sure the adhesive is fully bonded to the wall.
If the patch is mesh rather than solid aluminum, take a moment to confirm that it sits flat. Any wrinkles or lifted corners will show through later coats of compound, and they are easier to fix now than after the first coat has dried. A small piece of painter’s tape can hold a stubborn corner down while the joint compound goes on.
For very small holes under half an inch, the patch can be skipped entirely. Press a thin layer of joint compound directly into the opening with the tip of a joint knife, let it dry, and sand it flush before applying a second wider coat to feather the edges.
Apply the joint compound
Joint compound is the material that actually fills the patch and creates the flat surface that paint will sit on. The key is to apply it in thin coats, let each coat dry fully, and sand lightly between coats. Heavy coats take longer to dry, crack as they shrink, and are harder to sand smooth.
- Load a six-inch flexible joint knife with a moderate amount of compound. Too much material on the blade leads to streaks and waste; too little leads to thin, dragged-out coverage.
- Spread the compound over the patch in a crisscross pattern, pressing firmly enough to force material through the mesh of the patch. The first coat is the bonding coat, and it should fully embed the patch.
- Feather the edges outward by lifting the blade slightly as you reach the outer edge of the patch, so the compound thins to almost nothing where it meets the existing wall. This is the single biggest factor in whether the repair is visible under raking light.
- Let the coat dry until it is uniformly light in color and feels hard to the touch. Premixed compound usually needs two to four hours; hot, dry, or well-ventilated rooms can cut that in half.
- Sand lightly with a dry sanding sponge to knock down ridges and trowel marks. Wipe dust away with a damp rag before the next coat.
- Apply a second wider coat with a ten-inch knife if the patch is large, feathering even farther out. A third skim coat is often worthwhile on patches bigger than four inches to make the blend invisible.
One practical note: it is much easier to add a third thin coat than to sand down a thick coat that was applied too heavily. Slower buildup with a wider knife almost always produces a flatter result than aggressive sanding later.
Match the existing wall texture
Smooth walls are easy. Most interior walls have some kind of sprayed or rolled texture, and that texture is what makes a patch obvious even when the surface is perfectly flat. Matching it is a separate skill from the patch itself, but it is the difference between a hidden repair and a visible scar.
| Texture type | Appearance | Matching approach | Common rooms |
|---|---|---|---|
| Smooth / flat | No visible surface variation | Skim, sand, and prime as usual | Modern living rooms, dining rooms |
| Orange peel | Fine, even speckling, slightly raised | Thinned compound dabbed with a sponge or hopper spray | Bedrooms, hallways, most newer construction |
| Knockdown | Flat splatters with softened peaks | Sponge on thinned compound, wait 10 to 15 minutes, drag a taping knife across | Many single-family homes, especially in the South and West |
| Popcorn / acoustic | Heavy, granular texture | Bag-on-wall patch or sprayed acoustic coating, often best left to pros | Older ceilings, some apartment interiors |
| Slap brush or stomp | Visible brush marks or arcs | Specialty brushes, often purchased from drywall supply stores | Custom finishes, accent walls |
For most orange peel and knockdown walls, thinned joint compound is the right material. A common working mix is roughly four parts premixed compound to one part water, stirred until the consistency resembles pancake batter. The thinner the compound, the lighter the texture, so small adjustments in water have a big effect on the final look.
For orange peel, dab the thinned compound lightly with a texture sponge, working from the center of the patch out into the surrounding wall. The motion is more like a gentle bounce than a press, and the goal is to duplicate the existing speckle pattern rather than to cover the patch with a uniform coat.
For knockdown, the same dabbing step is followed by a waiting period of about ten to fifteen minutes, then a very light pass with a clean taping knife to flatten the high points. Cleaning the blade after every pass keeps the knockdown pattern crisp. If a pass goes wrong, the compound can be scraped off and the area retextured once it dries, which is one of the more forgiving features of this finish.
Popcorn ceiling texture is the most difficult to match well, and the asbestos risk in homes built before the late 1980s is a reason to test a small sample before any scraping or patching. A more detailed look at the technique, including the orange peel and knockdown variations, is in this practical guide to repairing drywall holes, which provides useful background for this point.
Prime and paint the repair
New joint compound and bare patch areas absorb paint differently than the surrounding wall, so priming is not optional if the goal is an even sheen. A small roller tends to match the surrounding texture better than a brush, and a foam mini-roller works well on smooth walls.
Cut in the edges with a brush first, then roll a slightly larger area than the patch itself. Feathering the paint past the patch by a few inches helps the new coat blend with the existing finish, especially on walls that have been touched up over the years. Two finish coats are common, with light sanding between coats if the first coat raises the surface at all.
If the wall has faded from sunlight, even a perfect patch can look obvious because the surrounding paint is darker. In that case, painting the entire wall corner to corner, or at least from one break to the next, produces a much cleaner result than spot-painting the patch alone.
Common mistakes and how to avoid them
Most patch failures fall into a handful of predictable patterns. Recognizing them ahead of time is the easiest way to skip the rework.
- Skipping the feathering step. A thick, sharp edge of compound around the patch is almost impossible to hide under paint. Always pull the knife away gradually so each coat thins to almost nothing at the outer edge.
- Rushing dry time. Applying the next coat over compound that still feels cool or damp traps moisture and leads to cracking, bubbles, or a soft spot that never fully cures. Light color and a hard surface are the two cues that compound is ready for the next coat.
- Sanding too aggressively. Heavy sanding can dig into the mesh of the patch or expose the paper edge of the original drywall. A dry sanding sponge used with light pressure is usually enough between coats.
- Mismatched texture. A perfectly flat patch on a textured wall, or a heavy texture on a smooth one, is more obvious than a slightly imperfect color match. Test the texture on a scrap of cardboard or in a closet before committing to the wall.
- Painting without primer. Without primer, the patched area soaks up more paint and ends up with a different sheen. A quick coat of drywall primer evens out the absorbency and makes the finish coat behave like the rest of the wall.
When to call a professional
Most small repairs are well within a homeowner’s reach, but a few situations are worth handing off. Holes larger than about six inches usually need a new piece of drywall screwed into the studs, which is faster for a crew with experience than for a first-timer. Popcorn ceiling texture older than the late 1980s can contain asbestos, and a sample should be tested before any scraping or wet sanding. Any repair that involves cutting near electrical wiring, plumbing, or a fire sprinkler head is a good place to stop and call a licensed contractor.
Water-damaged drywall is its own category. If the wall is soft, discolored, or smells musty, the source of the moisture has to be found and fixed before any patch goes on, or the new compound will fail along with the old. A main drain cleaning or a roof repair is often the first step in that kind of project, and a quick inspection of the area around the damage is worth the time.
Frequently asked questions
What size hole can be patched without cutting into a stud?
Self-adhesive patches handle holes up to about six inches across without any framing support. The patch overlaps the surrounding drywall by an inch or more, and the joint compound locks the edges into the wall. For larger openings, a new piece of drywall should be screwed into the nearest studs on each side.
Do I need a mesh patch or a metal patch?
Both work on small to medium holes. Mesh patches are inexpensive, easy to find, and slightly more forgiving for first-time repairs. Aluminum patches are stiffer and create a flatter base, which can be helpful on wider repairs. The joint compound application is the same either way.
How long does the full repair take from start to finish?
A small patch with one or two coats of compound usually dries in a half day, including the texture and primer. A larger patch with three coats of compound plus knockdown texture typically needs a full day. Either way, the actual hands-on time is under an hour for most household repairs.
Can I use spackle instead of joint compound?
Spackle works well for nail holes and very small dings, but it is more expensive per volume and tends to crack if applied thickly. Joint compound is the standard material for anything larger than a nail hole, and it sands more smoothly. Lightweight spackle can be used for skim coats in a pinch, but the regular all-purpose compound is usually the better choice.
What is the best way to match knockdown texture?
Apply thinned joint compound with a texture sponge in a dabbing motion, let it set for about ten to fifteen minutes until the surface is tacky but not wet, then drag a clean taping knife lightly across to flatten the high points. Working in small sections and cleaning the blade between passes produces the cleanest match.
Why does the patched area look shinier than the rest of the wall?
Unprimed joint compound absorbs paint differently and gives the patch a different sheen. A coat of drywall primer before the finish paint evens out the absorbency. A different roller nap or a different paint batch can also produce a slightly different sheen, so rolling a slightly larger area than the patch helps the new paint blend in.
Can I patch a hole that is right next to an electrical box?
Yes, but the power to that circuit should be turned off at the breaker before any cutting or sanding begins. The patch is applied around the box, and the faceplate is reinstalled once the repair is dry. If the box itself is loose or damaged, a separate repair or a call to an electrician is the safer route.
Is it worth fixing small nail holes myself or should I just leave them for the next paint job?
Small nail holes are fast to fill with a dab of compound and a finger or a small putty knife. Filling them now keeps paint from seeping into the opening and makes the next paint job much faster. The total time for a room’s worth of nail holes is usually under twenty minutes, including the wait for the compound to dry.
How do I know if old drywall texture contains asbestos?
Asbestos was commonly used in sprayed ceiling texture through the late 1980s. The only reliable way to know is to have a small sample tested by a certified lab. Local health departments and many home inspection services can point to a lab in the area. Any scraping, sanding, or drilling into suspected material should wait until the test results are back.
What should I do if the patch starts to crack weeks after the repair?
A small crack at the edge of a patch usually means the original compound was applied too thickly or the underlying drywall shifted. The fix is to widen the crack slightly with the edge of a utility knife, press a thin coat of compound into it, and feather it out. Larger cracks or a recurring pattern of cracks suggest movement in the framing, which is worth a closer look before any further patching.
Most of the equipment and habits that go into learning how to fix squeaky brakes do not transfer to drywall, but the same general approach does: small problems are usually cheap to fix, the right tool saves a lot of time, and patience matters more than speed. A clean, well-feathered patch with matched texture and primer will look new again, and most homeowners find that the second repair goes faster than the first.
Leave a Reply