
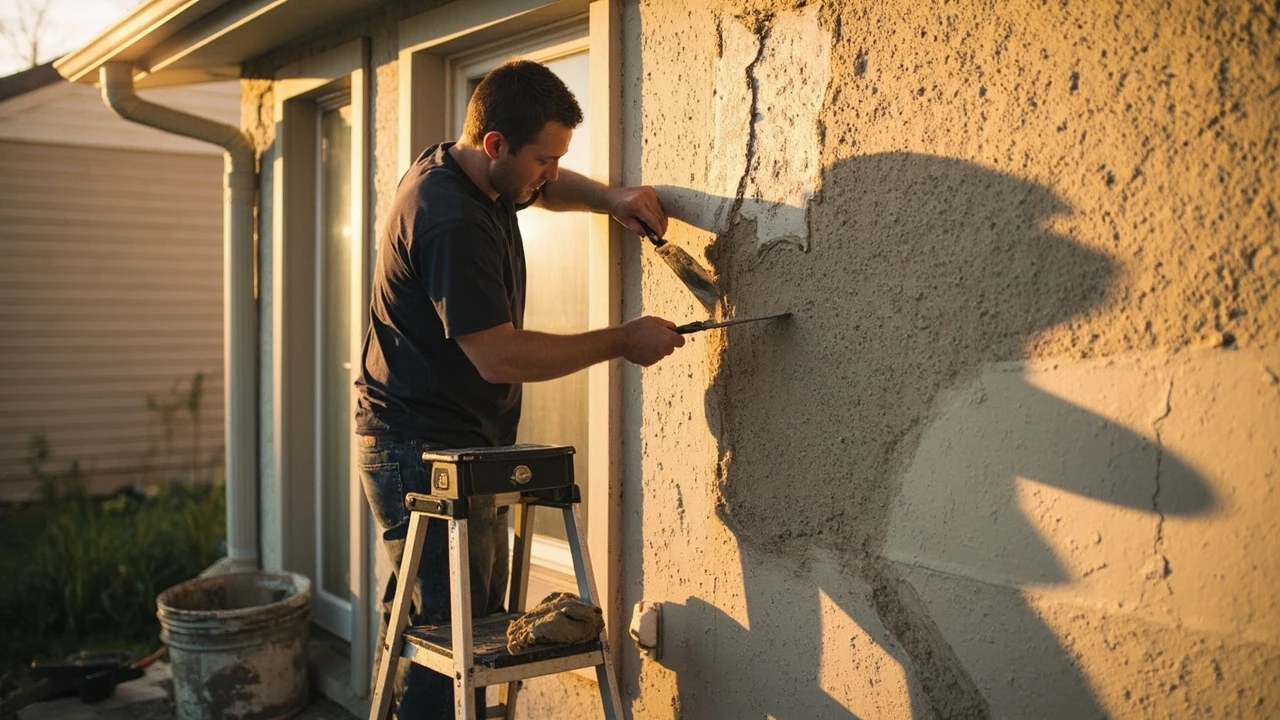
Stucco repair: what homeowners actually need to know
A fine crack shows up at the corner of a bedroom window after a long winter. A brown stain spreads a few inches below the gutter. A small chunk of finish pops off when a kid’s soccer ball hits the wall. Each of these is a stucco repair problem, and each one has a different right answer depending on what is underneath the surface and how the wall was built.
Stucco is a layered cementitious cladding that has protected exterior walls for more than a century. It is durable, energy-efficient, and visually flexible, but it is also rigid, porous, and unforgiving when water gets behind it. Knowing when to patch, when to dig deeper, and when to call a pro is the difference between a $40 fix and a four-figure envelope job.
This guide walks through how to think about stucco repair on a real house. It covers how stucco fails, how to tell cosmetic damage from structural damage, which materials to match, and how a proper patch is layered, cured, and blended. It also explains the practical limits of a DIY approach and where a professional crew is worth the money.
How stucco actually works on a wall
Traditional exterior stucco is a three-coat system applied over a supporting structure. The wall behind the stucco is sheathed in plywood or oriented strand board, wrapped in a weather-resistant barrier, and then covered with metal lath, a welded wire mesh that gives the stucco something to grip.
On top of the lath, an installer applies the scratch coat, a rough base layer pressed firmly into the mesh. Once that cures, a brown coat is added to build thickness and create a flat plane. Finally, the finish coat provides color and texture. Each layer needs time to cure before the next one goes on, and the wall is only as strong as the curing discipline behind it.
Modern homes often use a one-coat or two-coat system over rigid foam insulation board, sometimes called an EIFS-style assembly. These walls feel similar from the outside, but they behave differently when damaged, because the foam layer can trap moisture if the outer skin is breached. That difference is one of the first things a serious stucco repair assessment has to identify.
Common types of stucco damage
Stucco damage usually shows up in a few recognizable forms, and the form usually hints at the cause. Recognizing the difference keeps a homeowner from patching over a problem that is still moving underneath.
- Hairline cracks: thin, shallow splits under 1/16 inch wide, often following mortar joints or running diagonally from window corners. Usually cosmetic and tied to normal expansion and contraction.
- Spider or map cracking: a network of fine cracks that looks like cracked pottery. Often tied to poor curing, over-watered mix, or a finish coat applied too soon.
- Larger structural cracks: cracks wider than 1/8 inch, especially if they run continuously, are offset between sides, or keep growing. These usually signal wall movement, lath problems, or foundation issues.
- Staining and discoloration: brown streaks below gutters, white chalky bloom, or dark patches that stay wet. Often moisture-related rather than surface-level.
- Spalling or chunks missing: pieces of finish or brown coat that have popped out, sometimes with rust stains. Often means rusted lath or prolonged water intrusion behind the surface.
- Soft spots and bubbling: areas that give slightly when pressed or that look like they are lifting off the wall. A sign that the bond has failed, often because water got behind the stucco.
What causes stucco to fail in the first place
Almost every stucco repair problem traces back to one of three root causes: movement, moisture, or a shortcut during the original application.
Movement is the most common. Wood framing shrinks as it dries, and seasonal humidity swings make the wall expand and contract. Stucco is rigid, so it moves with the house and eventually cracks at stress points: window corners, door headers, and where two walls meet. A small amount of cracking is normal. Cracks that keep returning after patching usually mean the wall is still moving, and the repair needs to absorb that movement, not just fill the gap.
Moisture is the second cause, and the more expensive one. Stucco is porous, so it absorbs some water by design. Problems begin when that water cannot escape. Failed flashing above windows, missing kick-out flashing where a roof meets a wall, clogged gutters, or sprinklers that hit the same wall every day will all drive water into the stucco. Once water reaches the lath, rust begins, the bond weakens, and the damage moves from the surface into the structure.
Shortcuts during installation are the third cause. Skipping the weather-resistant barrier, using the wrong lath, mixing stucco too wet, applying coats too thin, or rushing the cure all create a wall that is going to fail early. There is no reliable DIY fix for these problems, because they are in layers the homeowner cannot see.
Inspecting the damage before you touch a trowel
The cheapest part of any stucco repair is the inspection that decides what kind of repair it really is. Start by mapping the damage. Walk the wall slowly, mark every crack, stain, and soft spot with masking tape, and take photos. Look up at the eaves, around penetrations like hose bibs and light fixtures, and at the base of the wall where it meets the ground or a deck.
Press gently on suspicious areas with a gloved hand or the handle of a screwdriver. Solid stucco feels like concrete. A soft spot that gives, flakes, or sounds hollow is a sign that the bond has failed underneath, and a patch over the top will fail again in months.
Check the area around the damage for clues. Rust streaks mean rusted lath. White bloom means moisture is moving through the wall and evaporating on the surface. Discoloration that returns after cleaning usually means water is still coming in. A moisture meter designed for masonry helps, and a thermal camera can highlight cold, wet patches, but a careful visual inspection catches most of what a homeowner needs to know before calling anyone.
Matching the existing stucco system
Before buying any patch material, it is worth understanding what is already on the wall. The two most common exterior systems are traditional hard-coat stucco over lath and an acrylic or synthetic finish over a cement base. They look similar but use different patch products and primers.
On a hard-coat stucco wall, the patch should also be a cement-based stucco that matches the original three-coat or one-coat system. The textures range from a smooth Santa Barbara finish to a heavy dash, and the color often comes from integral pigment rather than paint. Buying a generic “stucco patch” from a hardware store and troweling it on a real three-coat wall often produces a different color, a different hardness, and a different texture, all of which read as a visible scar.
On an acrylic or synthetic system, patches usually need a flexible acrylic-based product, a bonding agent, and a color-matched topcoat from the original manufacturer when possible. Using cement-based stucco on a synthetic wall, or vice versa, is a frequent source of failed repairs, because the two systems expand and absorb moisture at very different rates.
Quick comparison of common stucco systems
| System type | Typical build-up | Best patch material | Watch-outs |
|---|---|---|---|
| Traditional three-coat stucco | Scratch coat, brown coat, finish coat over metal lath and WRB | Cement-based stucco patch matched to coat thickness | Long cure times; texture and color matching is hard |
| One-coat stucco over foam | Modified cementitious base coat over insulation board and lath | Manufacturer-matched base coat and finish | Moisture can be trapped in the foam layer if the skin is breached |
| Acrylic or synthetic finish | Cement base coat with a flexible acrylic topcoat | Acrylic-based patch compound and color-matched topcoat | Cement patches will crack and discolor the acrylic layer |
| EIFS-style exterior | Foam insulation, base coat with mesh, synthetic finish | System-specific patch kit from the original manufacturer | Any water intrusion can rot the substrate invisibly |
Repairing a small crack yourself
A single hairline crack in otherwise sound stucco is the most realistic DIY stucco repair, and it is the one most likely to hold. The goal is not to make the crack disappear forever, because the wall will keep moving with the seasons. The goal is to seal the crack so water cannot get in and to leave a flexible patch that moves with the wall.
Start by widening the crack just enough to give the patch something to grip. A margin trowel, a utility knife, or a small cold chisel works. Cut a V-shaped groove about a quarter inch deep along the crack, then brush out the dust with a stiff bristle brush or a vacuum. Wipe the surface with a damp rag so the wall is clean but not soaking.
For a flexible repair, use a high-quality elastomeric stucco crack filler or a paintable exterior urethane sealant. Squeeze it into the groove and tool it smooth with a wet finger or a small putty knife so it sits slightly proud of the surface. Once it skins over, it can be painted to match the wall. Pure silicone is a poor choice here, because most exterior paints will not bond to it.
For slightly wider cracks, a cement-based stucco patch can be used, but it should be applied in a thin layer and allowed to cure slowly. Mist the patch with water a few times a day for two to three days. A patch that dries out in one afternoon in summer is a patch that will crack again within a year.
Repairing a small section of damaged stucco
When a chunk of finish has popped off, or a localized area is soft and crumbling, the right stucco repair is a sectional patch rather than a simple crack fill. This is still within reach of a careful homeowner, but it is closer to the limit of a sensible DIY project.
Use a hammer and a cold chisel to remove all loose material back to a sound edge. Cut a clean, rectangular or slightly trapezoidal shape rather than a ragged hole, because straight edges are easier to fill cleanly. Stop cutting as soon as the remaining stucco feels solid under the chisel. Exposing the lath is normal, and replacing rusted lath is part of the job.
Once the area is clean, brush and vacuum the dust, then check the metal lath. If it is rusted through, missing, or detached, cut a new piece of galvanized lath to fit and secure it with galvanized fasteners. If the lath is intact, a bonding agent brushed onto the existing stucco helps the new patch stick.
Apply a scratch coat, pressed firmly into the lath and scored with horizontal lines for the next layer to grip. Let it cure for at least 24 to 48 hours, misting it occasionally. Then apply a brown coat to bring the patch close to the surrounding plane, and let it cure for several more days. The final coat is a color- and texture-matched finish, applied carefully and blended at the edges so the patch does not stand out.
Curing times for a sectional patch
| Coat | Typical thickness | Minimum cure time | Curing practice |
|---|---|---|---|
| Scratch coat | 1/4 inch | 24 to 48 hours | Mist 2 to 3 times a day, keep out of direct sun if possible |
| Brown coat | 3/8 inch | 5 to 7 days | Mist once or twice daily, protect from heavy rain |
| Finish coat | 1/8 inch or less | 5 to 7 days before painting | Avoid direct sun and wind, allow full cure before sealing |
Choosing between a DIY patch and a professional crew
Most homeowners can handle a hairline crack or a fist-sized patch if the damage is clearly cosmetic. Beyond that, the question of whether to hire out becomes a question of risk rather than cost. A bad stucco repair is harder to undo than a bad paint job, because the failed patch has to be cut back out before it can be re-done.
DIY is usually reasonable when the damage is small, the surrounding stucco is solid, the wall is a single story, and the homeowner is comfortable on a ladder with a trowel. Hiring out is usually the better choice when there is any sign of water intrusion, when the wall is more than one story, when the damage is along a roof-to-wall transition, or when a previous patch keeps failing.
Price ranges vary widely by region, wall height, and the type of system on the house. As a very rough rule of thumb, a small sectional patch on an accessible ground-floor wall can land in the low hundreds of dollars for a professional, while a full re-skin of a single wall can run into the low thousands. Any quote that sounds unusually low deserves a closer look, because the labor to do the job right, including cure time and texture matching, is what most of the cost really is.
How to vet a stucco repair contractor
Stucco is a trade where shortcuts are easy to hide behind a coat of paint. A careful homeowner asks a few specific questions before signing anything.
- What system is on the wall now, and which product line do you plan to match it to?
- How will you handle the existing lath if it is exposed or rusted?
- How long will each coat cure before the next one is applied?
- Will you leave a written scope that includes texture and color matching, not just a square-foot price?
- What warranty do you offer, and what does it actually cover?
A good answer references the specific system on the house and explains the cure schedule, not just a per-square-foot number. A vague answer about “we will make it look new” is a sign that the contractor is not thinking about the layers that matter.
Preventing the next repair
Most stucco repair work that happens more than once on the same wall could have been avoided with a little maintenance. Stucco is tough, but it is not maintenance-free, and a short annual routine goes a long way.
Walk the exterior once or twice a year, ideally in spring and fall. Look for new cracks, staining, soft spots, and any place where sealant around windows, doors, or penetrations has failed. A $10 tube of exterior sealant and a few minutes of work will often prevent a $1,000 patch.
Keep water moving away from the wall. Clean gutters before they overflow, make sure downspouts discharge at least a few feet from the foundation, and adjust irrigation heads so they do not soak the same wall every day. Pay particular attention to kick-out flashing where a roof line ends against a stucco wall, because that is a very common source of hidden leaks.
Consider a breathable, siloxane-based water repellent on bare stucco every few years. A good repellent keeps liquid water out while allowing the wall to dry from the inside. Avoid film-forming sealers on stucco, because they trap moisture and create exactly the kind of trapped-water damage the sealer is meant to prevent.
What to do when the damage is structural
Sometimes a stucco repair is really a wall repair, and the stucco is just the messenger. Long, continuous cracks wider than a quarter inch, walls that bow visibly, or areas where the finish keeps failing despite repeated patching are usually symptoms of movement behind the cladding. That movement can come from a settling foundation, a failing window header, or rotted sheathing from a long-standing leak.
For these cases, a surface patch is a temporary cosmetic fix at best. The right next step is a structural assessment by a licensed engineer or a contractor who specializes in stucco and building envelopes, not a general handyman. They will check the framing, the sheathing, the weather barrier, and the lath, and they will write up what actually needs to come off the wall before anything new goes on.
A reputable assessment costs more than a patch and less than a full re-skin, and it is the single best way to avoid paying twice for the same problem.
Frequently asked questions
How do I know if a stucco crack is cosmetic or serious?
Hairline cracks under 1/16 inch that do not change much between seasons are usually cosmetic. Wider cracks, cracks that keep growing, cracks that are offset between the two sides, or cracks paired with staining or soft spots are more likely to signal movement or moisture behind the wall and deserve a closer look.
Can stucco be repaired in cold or wet weather?
Stucco needs stable, moderate conditions to cure properly. Cold temperatures slow the cure and can leave the mix weak, and rain can wash out a fresh coat. Most manufacturers recommend working when temperatures stay above about 40 to 50 degrees Fahrenheit and when no rain is expected for at least 24 to 48 hours after each coat.
How long does a stucco repair last?
A well-matched patch with proper cure time on a sound wall can last as long as the surrounding stucco, often decades. A rushed patch on a wall that is still moving or still wet usually fails within a season or two. The lifespan is less about the patch material and more about whether the underlying cause has been fixed.
What is the difference between stucco and EIFS?
Traditional stucco is a rigid cement-based system over lath. EIFS, or Exterior Insulation and Finish System, uses foam insulation board, a reinforced base coat, and a synthetic finish. They look similar from the curb, but EIFS is more flexible and more sensitive to water intrusion, and it usually requires system-specific patch products from the original manufacturer.
Should I seal my stucco after a repair?
A breathable, siloxane-based water repellent can help on bare, unpainted stucco. It keeps liquid water out while letting the wall dry. Film-forming sealers and elastomeric paints are a different story. They can trap moisture inside the wall and cause the very damage they are meant to prevent, so they are not a good default choice for a stucco exterior.
How much does professional stucco repair cost?
Costs vary by region, wall height, and the type of system on the house. A small, accessible crack repair can be a few hundred dollars, a localized patch often lands in the low to mid hundreds, and a full re-skin of a wall can run into the low thousands. The biggest cost driver is almost always labor and cure time, not material.
Can I paint over a stucco repair right away?
No. Paint needs a fully cured surface to bond. Most stucco manufacturers recommend waiting at least 28 days, and in some cases longer, before applying a topcoat. Painting too early traps moisture in the patch and leads to peeling, flaking, and a visible scar at the repair.
Is it normal for a new stucco repair to look slightly different in color?
Yes, especially on unpainted stucco. New stucco is usually a slightly different shade than the surrounding wall because of differences in mix, water content, and curing. The color often blends in over several months of weather exposure. Painted stucco can usually be color-matched more precisely, but a perfect match right away is still hard to guarantee.
What is the biggest mistake homeowners make with stucco repair?
Covering a moisture problem with a cosmetic patch. As soon as water is getting behind the stucco, a surface repair is only buying time, and the real repair is usually more involved. Finding and fixing the water entry point is what actually protects the wall.
How do I find a good stucco repair contractor?
Look for a crew that specializes in stucco and building envelopes rather than a general handyman, and ask to see recent local work. Good contractors will talk about the system on the wall, the lath, the cure schedule, and the texture and color match before they quote a price. Vague answers about square footage and “making it look new” are a warning sign.
Stucco is one of the most forgiving exterior claddings when it is given a little attention, and one of the most punishing when it is ignored. A quick annual look, a thoughtful fix when a crack first appears, and a willingness to call a pro when water shows up behind the surface will keep the wall doing its job for the rest of its life.
Leave a Reply