
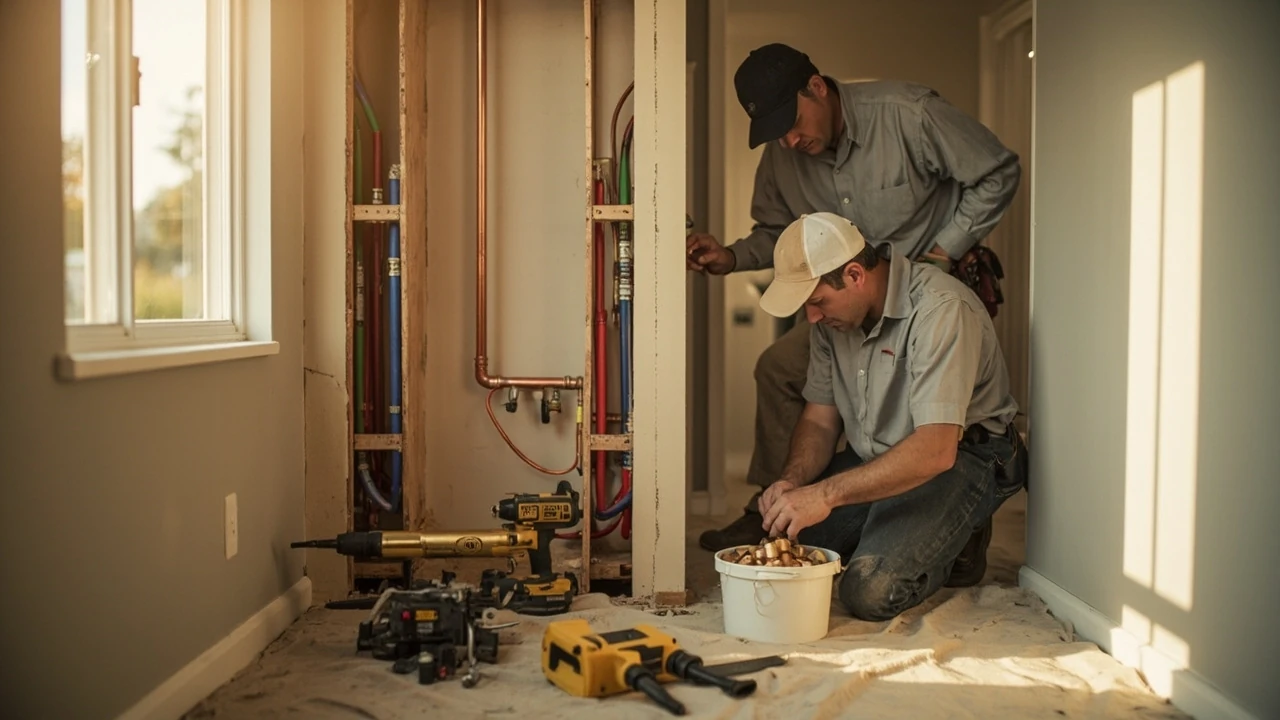
Whole house repiping: what it really means for an older home
A pinhole leak in a second-floor bathroom ceiling, rusty water in the kitchen tap, a water heater that rumbles every time the washing machine runs. Each of these on its own can be patched. Together, they usually point to a single underlying problem: the supply piping inside the walls has aged past the point of reliable repair. That is the situation whole house repiping is designed to solve, replacing every domestic water line from the service entry to the farthest fixture rather than chasing leaks one at a time.
For a homeowner weighing the decision, the project can feel intimidating because it touches every wall, every floor, and every daily routine in the house. The goal of this guide is to make the work concrete. It covers the warning signs that justify a full repipe, the materials most plumbers install today, the realistic sequence of work, the cost drivers a quote should reflect, and the questions worth asking a contractor before signing a contract.
There is no single right answer for every property. A 1960s ranch with original galvanized steel, a 1990s two-story with polybutylene, and a 1940s bungalow with a mix of copper and patched sections all lead to different conversations. The framework below is built to help a reader make the call for their own home rather than copying a generic checklist.
When whole house repiping makes more sense than another repair
Spot repairs stay sensible when the system is generally sound and the failure is localized, a single corroded elbow behind a sink, a worn angle stop, a section of pipe damaged by a nail. Once leaks start appearing in multiple rooms, the picture changes. The pipes themselves, not the fittings, are usually the limiting factor.
A few patterns tend to push a homeowner past the repair phase:
- Three or more visible leaks in different areas of the house within a short period, often on separate branch lines.
- Brown, red, or yellow water at multiple fixtures, especially first thing in the morning, suggesting internal corrosion rather than a municipal issue.
- Noticeable pressure drop when more than one fixture is running, frequently caused by internal buildup narrowing the pipe diameter.
- Visible green or white crust on exposed copper, flaking on galvanized joints, or brittle sections of polybutylene that flex when touched.
- A known material history. Galvanized steel installed before the 1970s, polybutylene installed between the late 1970s and mid 1990s, and even early copper with lead solder all carry known service-life limits.
If two or more of these apply, continuing to repair individual sections usually means paying the same wall-opening and restoration cost several times. A single coordinated project trades a larger one-time disruption for a system that is, for practical purposes, new.
Materials used in modern whole house repiping
Material choice affects cost, install speed, water quality, and how the system behaves over decades. The three options most plumbers present are copper, PEX, and CPVC, with PEX and copper dominating most residential work in 2026. PVC is common for drain lines but rarely used for pressurized supply inside the living space, so it is not compared in the table below.
| Attribute | Copper (Type L) | PEX (cross-linked polyethylene) | CPVC (chlorinated PVC) |
|---|---|---|---|
| Typical service life | 50+ years when water chemistry is compatible | 40 to 50 years under normal conditions | 30 to 40 years, sensitive to temperature |
| Corrosion behavior | Resists internal corrosion; can pit in aggressive water | Immune to rust and scale | Resists corrosion; can become brittle with age and heat |
| Installation method | Soldered or pressed fittings, rigid runs | Crimp, clamp, or push-to-connect fittings, flexible coils | Solvent-welded joints, rigid runs |
| Wall opening required | More, because of rigid routing and fitting locations | Less, because long flexible runs reduce joint count | More, similar to copper |
| Freeze-damage risk | High; water inside can split the pipe | Lower; PEX expands before rupturing in most cases | Moderate; can crack if frozen |
| Relative material cost | Highest | Low to moderate | Low to moderate |
| Common concerns | Price volatility, water-chemistry compatibility | UV sensitivity, very long-term data still maturing | Joint method, higher temperature limits |
For many homes, the practical decision is between copper and PEX. Copper is familiar, recyclable, and well understood by every licensed plumber. PEX is faster to install, quieter behind walls, and usually cheaper on the labor side because the long flexible coils reduce the number of joints inside the structure. The Benjamin Franklin Plumbing guide to whole-house repiping walks through the same trade-offs and is a useful second opinion when comparing material proposals side by side.
How a plumber evaluates a home before recommending a repipe
A reputable contractor does not quote a repipe based on square footage alone. The estimate should reflect what is actually inside the walls. Before signing, a homeowner can expect the plumber to do four things during the assessment.
- Map the existing system. Locating the main shutoff, the water heater, and each fixture branch, and noting pipe material, diameter, and routing as best it can be observed.
- Test water pressure and quality. Static and dynamic pressure at a few fixtures, plus a visual check of water clarity after the lines have sat overnight.
- Open at least one exploratory section. A small drywall cut at a representative location, often behind a tub or in a ceiling below a bathroom, to confirm pipe condition rather than guessing it.
- Discuss fixture count and future plans. Whether the homeowner plans to finish a basement, add a bathroom, or replace the water heater soon changes pipe sizing and routing decisions.
The output of that visit is a written scope: which material, which fittings, what is included in wall patching and paint, and which items (such as new shutoff valves or a pressure-reducing valve) are listed as allowances or upgrades.
Step-by-step: what happens during the actual work
Knowing the sequence helps a homeowner plan around the disruption. A whole-house repipe of a typical single-family home runs three to seven working days, depending on size, material, and how much drywall needs to come out.
- Day-of prep. The crew protects floors and furniture with drop cloths, photographs existing conditions, and confirms which rooms will be off limits for the day.
- Strategic drywall cuts. Openings are made at fixture locations and at major routing points, not in random places. The goal is to remove enough wall to pull old pipe and run new pipe, and no more.
- Old pipe removal or abandonment. Galvanized and polybutylene are usually pulled out. Copper is sometimes left in place if it does not interfere with the new routing, but abandoned sections are capped and documented.
- New pipe installation. For PEX, this means running long coils through the cavities with a manifold approach or trunk-and-branch layout. For copper, it means measuring, cutting, soldering or pressing, and securing each run.
- Rough-in inspection. Before any wall is closed, the new system is pressure-tested, usually with air at higher than operating pressure or with water held for a set period, and then signed off by the local building inspector where required.
- Wall closure and surface repair. Drywall is patched, taped, and left ready for paint. Some contractors include paint; many exclude it, and that detail belongs in the written estimate.
- Final trim and testing. New shutoff valves and supply lines to fixtures are installed, the system is flushed, and each fixture is checked for pressure, temperature, and leaks.
Water is usually off for portions of each working day rather than the entire project. A two-bathroom home often runs on a single bathroom overnight by sequencing work; a one-bathroom home typically needs an arrangement with neighbors for at least one evening.
Cost drivers a homeowner should understand
Published cost ranges online are useful only as a starting point. The actual number on a proposal changes with several specific inputs. A clear estimate should break those out.
| Cost driver | Why it matters | Typical impact on total |
|---|---|---|
| Home size and fixture count | More fixtures means more branch lines, more shutoffs, and more connections to test. | Large |
| Number of stories and foundation type | Multi-story homes and slab foundations require more drilling, longer pipe runs, and additional labor. | Large |
| Material choice (copper vs. PEX vs. CPVC) | Copper is typically the most expensive material, PEX is usually the cheapest installed. | Medium to large |
| Wall and ceiling access | Drywall cuts, tile removal, and any plaster or lath work all add labor hours. | Medium |
| Local code and permit fees | Some jurisdictions require full-permit rough and final inspections, with associated fees. | Small to medium |
| Surface restoration included | Patching only versus full paint, texture match, and trim repair changes the bottom line significantly. | Medium |
| Add-ons like new main shutoff, PRV, or recirc pump | Often recommended once walls are open, but optional and itemized. | Small each, can add up |
A useful negotiating move is to ask the contractor to separate material, labor, and restoration into three line items, then to compare two or three proposals on the same basis. A bid that looks cheaper on the total often reflects a thinner scope on wall repair or a smaller list of included fixtures.
Common pitfalls during a whole house repiping project
Most repipes go smoothly, but the same problems show up across the industry. Knowing them in advance is the easiest way to avoid them.
- Unclear scope. Verbal promises about paint, texture, and fixture count are easy to forget. The written contract should list every included and excluded item.
- No pressure test documented. The rough-in should be pressure-tested in front of the homeowner or photographed with a gauge visible. Verbal reassurance is not enough.
- Old shutoff valves reused. Quarter-turn stops are inexpensive. Reusing 40-year-old stops on a brand-new system is a false economy that almost always fails shortly after the project closes.
- Inadequate flushing. New pipe, especially copper, can carry soldering flux residue and metal fines. A deliberate flush at full flow through every fixture protects the water heater and the homeowner.
- Permit skipped to save time. Unpermitted work can complicate a future home sale and may void parts of a manufacturer or workmanship warranty.
How to choose the right contractor for the job
Whole house repiping is not the place to chase the lowest number. The difference between a careful plumber and a careless one is rarely visible in the bid; it shows up six months later, in a damp spot behind a washing machine or a stuck shutoff valve.
- License and insurance. Active state or local plumbing license, plus general liability and workers’ compensation. Names and policy numbers on the estimate.
- Recent whole-house repipe experience. Not just service work, but a track record of completed repipes. References from jobs finished in the last 12 to 24 months are most useful.
- Written scope and fixed price. A clear statement of what is included, the material by name and grade, the number of fixtures covered, and what triggers a change order.
- Warranty terms in writing. Both a workmanship warranty (commonly one to ten years, depending on the company) and the manufacturer warranty on the pipe and fittings.
- Local permitting history. A contractor who pulls permits regularly knows the local inspector and the local expectations, which usually means a smoother close-out.
It is also reasonable to ask which crew will actually do the work. A well-known company that sends a different subcontractor than the one quoted is a common source of complaints.
Preparing the house and the household
Even a well-run project is loud, dusty, and disruptive for several days. A small amount of preparation saves a lot of frustration.
- Clear under every sink, around the water heater, and in front of the panel that houses the main shutoff.
- Take pictures of wall conditions before work starts. This makes any later damage claim straightforward.
- Plan for water outages. Store drinking water, fill a bathtub for flushing, and coordinate with a neighbor for use of a bathroom if the home has only one.
- Decide in advance what happens to pets and small children during the loudest days. Drywall cutting and press tools are not friendly to either.
- Discuss where the crew stages tools and debris. A garage bay or a paved driveway is normal; a finished living room is not.
After the work: what a good closeout looks like
The project is not finished when the water is back on. A clean closeout is its own quality signal and includes several items a homeowner should expect to receive.
- A written pressure-test record with the gauge reading and duration.
- Permit sign-off from the local building department, where applicable, with the inspection card or digital receipt.
- Manufacturer documentation for the pipe and fittings, including batch or part numbers for any future warranty claim.
- A full walkthrough of every fixture, with the homeowner turning each one on to confirm pressure and temperature.
- A clear list of what was excluded from the contract, especially items the contractor flagged for future attention.
Repiping is one of the few projects that touches the entire house at once, which is precisely why it deserves careful planning rather than an emergency response. A homeowner who enters the process with a clear sense of the warning signs, the material options, the realistic cost drivers, and the right questions for the contractor ends up with a system that disappears into the background of daily life, which is exactly what good plumbing is supposed to do.
Frequently asked questions
How long does a typical whole house repiping project take?
Most single-family homes are completed in three to seven working days, depending on size, number of fixtures, material choice, and how much wall and ceiling access the existing layout requires. Larger homes, slab foundations, and projects that include surface finishing can extend the timeline to two weeks or more.
Will I need to leave the house during the repipe?
Not usually. Water is typically off for portions of each workday rather than the entire project, and a two-bathroom home can often run on a single bathroom overnight. A one-bathroom home is more disruptive, and some households arrange to be elsewhere for at least one or two of the loudest days.
Is PEX or copper the better choice for a 2026 repipe?
Both are accepted by current plumbing codes and both can deliver decades of service. Copper has a longer track record, is recyclable, and handles high heat well, but it is more expensive and more invasive to install. PEX is faster to install, quieter, and less prone to freeze damage, though it cannot be used in certain UV-exposed locations. The best choice depends on the home’s layout, local water chemistry, and budget.
How do I know my home actually needs a full repipe?
Multiple leaks in different areas, recurring discolored water at several fixtures, low pressure that does not improve with a pressure-reducing valve adjustment, and a known problem material (galvanized steel, polybutylene, or lead-soldered copper of advanced age) are the strongest indicators. A licensed plumber can confirm with a pressure test, a water sample, and a small exploratory wall opening.
Does whole house repiping increase property value?
It rarely returns its full cost at resale as a line item, but it removes a major risk that buyers, lenders, and home inspectors flag during a sale. A documented recent repipe with permits and warranty paperwork tends to shorten time on market and reduce negotiation friction, even when it is not called out as a separate value.
Are permits required for whole house repiping?
In most jurisdictions, yes. Repipe work that touches the pressurized supply system usually requires a plumbing permit and at least one rough-in inspection before walls are closed. Skipping the permit can complicate insurance claims and future sales, so it is worth confirming with the local building department before work begins.
What should be included in a written repipe estimate?
At minimum: the pipe material by name and grade, the scope by fixture count, what wall and ceiling repair is included, whether paint and texture are included, the warranty terms, the payment schedule, and what triggers a change order. The estimate should also list exclusions clearly so that future disagreements have a written reference.
Can I repipe just part of the house to save money?
Partial repipes are common in transitional situations, for example, when one failing branch serves a kitchen that is about to be remodeled. They are usually less efficient than a whole-house job because the wall-opening and restoration cost is spent twice, and they leave an older section in place as a future liability. A plumber can model the trade-off for a specific home.
What kind of warranty should I expect on a repipe?
Workmanship warranties from established contractors typically run from one to ten years. Manufacturer warranties on the pipe and fittings vary by product line, with many PEX and copper products carrying limited warranties of 25 years or more when installed to specification. Both numbers, and any conditions that void them, belong in writing.
How do I maintain a new plumbing system after a repipe?
Keep static pressure within the recommended range, usually under 80 psi for most residential systems, and install a pressure-reducing valve if the street pressure is high. Avoid chemical drain cleaners, address small leaks promptly, and flush the water heater annually. A short annual check of visible shutoff valves and supply lines is enough to keep the system healthy for decades.
Leave a Reply